| What
is Water-Gate™?
Water-Gate™ is a portable, reusable water barrier that can be used
in place of traditional methods, such as sandbags, rock, or dirt dams.
Unlike sandbags, Water-Gate™ is “self-filling” and can
be installed or removed in minutes and be packed and reused for a different
application.
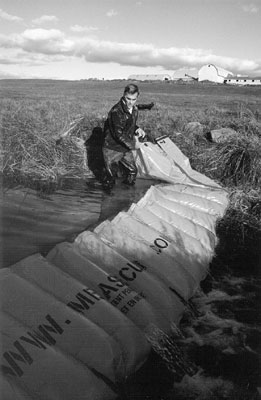
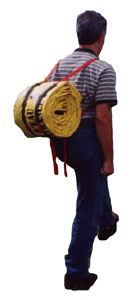
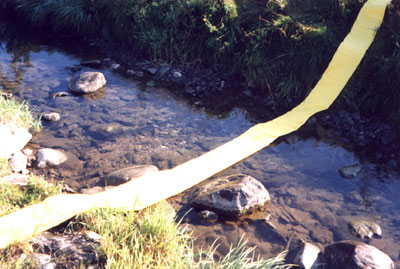
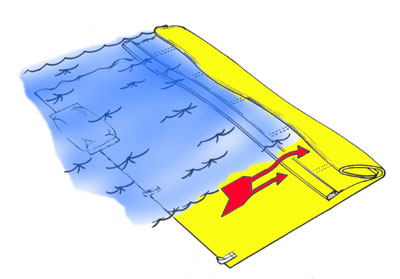
The portable barrier can be carried in a small pickup truck and smaller
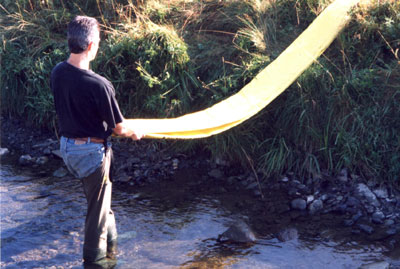
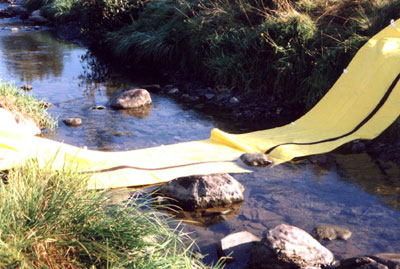
barriers can be carried by an individual (figure 1). They can be installed
by a single person (figure 2). Water-Gate™ comes in several lengths
and depths and can be linked together to create longer sections.
 |
|
| Figure 1-Portable
water barrier. |
Figure 2-Water-Gate™
can be installed by a single person. |
How
It Works
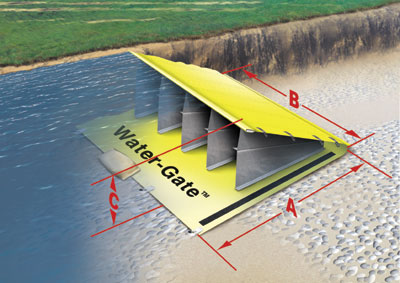
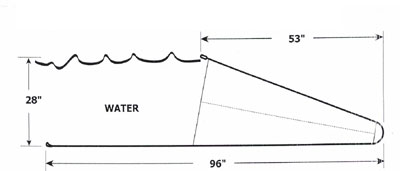
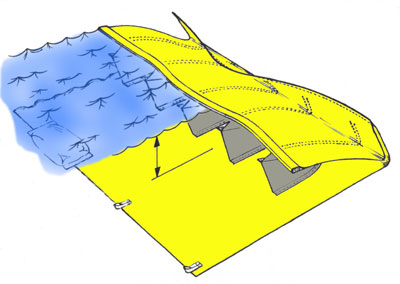
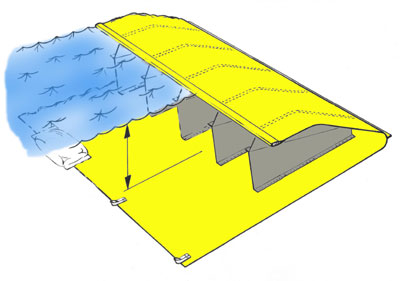
When Water-Gate™ is deployed, running water enters the barriers,
creating a wedge (figure 3). The pressure (force/area) exerted by the
water on the barrier holds it in place. Since the base (A) of the barrier
is wider than the depth (C) of the barrier, the total force applied to
the base is greater, preventing the barrier from moving downstream.
How
It Can Be Used
-
To build water reservoirs.
Water reservoirs used to meet pumping requirements can be created
by blocking streams and watercourses with Water-Gate™. The water
barrier has little or no negative effect on the environment: no sedimentation,
no damage to spawning grounds, and no need for earth-moving equipment.
More than half the provinces in Canada use a Water-Gate™ in
fighting fires.
-
To contain hazardous materials.
The Water-Gate™ liquid barrier enables personnel to respond
quickly to emergencies. The manufacturer of Water-Gate™, MegaSecur,
designed a barrier specifically for containing petrochemical spills.
This barrier can be installed in a straight configuration or curved
to increase fluid retention.
- To control flooding. Several
sections can be installed together by a single person to create a barrier
of the desired length. When the water recedes, the barrier flattens
by itself, ready to be folded and rolled up for future use.
How
To Install Water-Gate™
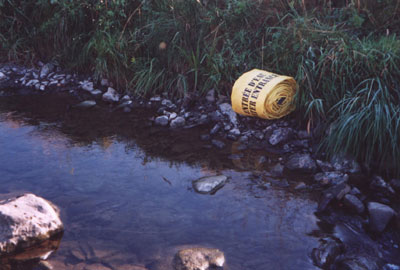 |
Step 1. Line
up the barrier as indicated on the roll.
|
 |
Step 2. Unroll
the barrier.
|
 |
Step 3. Place
the barrier where you want to set up your dam.
|
 |
Step
4.Unfold the bib on the barrier. A few large rocks can be placed
on the barrier so that the water can flow over it while you are
finishing installation. This will keep the water from becoming turbulent.
|
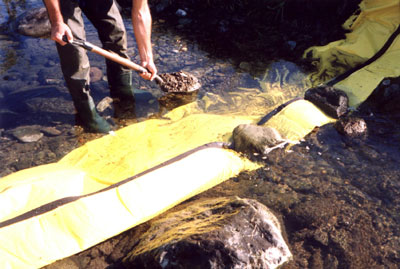 |
Step 5. Use
gravel or sandbags to make sure the bib is watertight when it is
laid in place.
|
 |
Step 6. When
the bib has been completely sealed, remove the large rocks to allow
the barrier to deploy by itself.
|
 |
Step 7. The
barrier will unfold and fill with water as shown. First the water
flows into the folds and then into the barrier itself.
|
 |
Step 8. As
the water enters, the barrier unfolds completely. The barrier comes
with a float, which keeps the fabric level with the surface of the
water.
|
 |
Step 9. The
barrier is opened by water pressure, which causes the top layer
of fabric to rise.
|
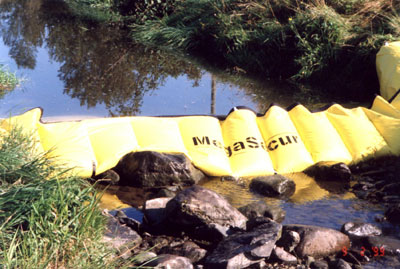 |
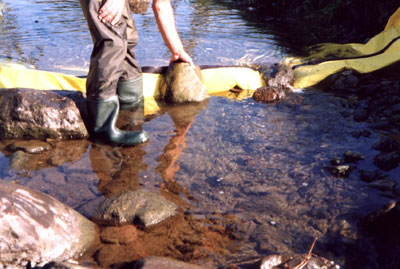
| Step 10. The
water pressure causes the barrier to mold itself to anything underneath.
In this photo, the barrier is molding to the large rock and the streambed. |
What
Sizes Are Available?
| Water Depth
in (m) |
Barrier
Length
ft (m) |
| 15 (0.381) |
25, 50 (7.6,
15.2) |
|
21 (0.533) |
30, 50 (9.1,
15.2) |
| 28 (0.711) |
����������������� 35, 50, 75 (10.7, 15.2, 22.9) |
Note:
Water-Gate™ can be linked to create longer lengths.
| Item |
Weight
lb (kg) |
Rolled Diameter
in (m) |
Rolled Height
in (m) |
Water Depth
in (m) |
Barrier
Width
in (m) |
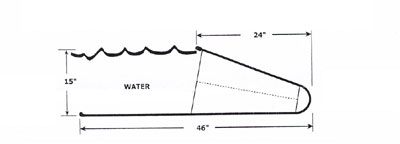
| MS 15-25� |
25 (11.3) |
14 (0.356) |
12 (0.305) |
15 (0.381) |
46 (1.17) |
| MS 15-50� |
50 (22.7) |
20 (0.508) |
12 (0.305) |
15 (0.381) |
46 (1.17) |
| Item |
Weight
lb (kg) |
Rolled Diameter
in (m) |
Rolled Height
in (m) |
Water Depth
in (m) |
Barrier
Width
in (m) |
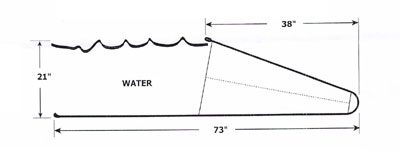
| MS 21-30� |
45 (20.4) |
15 (0.381) |
18 (0.457) |
21 (0.533) |
73 (1.85) |
| MS 21-50� |
75 (34.0) |
20 (0.508) |
18 (0.457) |
21 (0.533) |
73 (1.85) |
Item
|
Weight
lb (kg) |
Rolled Diameter
in (m) |
Rolled Height
in (m) |
Water Depth
in (m) |
Barrier
Width
in (m) |
| MS 28-35� |
77 (34.9) |
18 (0.457) |
22 (0.599) |
28 (0.711) |
96 (2.44) |
|
MS 28-50� |
���� 110 (49.9) |
21 (0.533) |
22 (0.599) |
28 (0.711) |
96 (2.44) |
| MS 28-75� |
���� 165 (74.8) |
26 (0.660) |
22 (0.599) |
28 (0.711) |
96 (2.44) |
What
Support is Available?
A water barrier user’s guide (16 pp) and a videotape (12 min, 30
s) entitled “How to Install a Water Barrier in Watercourses”
are free with the purchase of any Water-Gate™. Techniques presented
in the videotape will help maximize the use of the Water-Gate™ water
barrier.
Where
Can I Purchase It?
MegaSecur Inc.
145 Jutras Blvd. East, Suite 3
Victoriaville, QC Canada G6P 4L8
Phone: 819-751-0222
Fax: 819-751-5550
www.megasecur.com
|
|
For Additional Information
Contact:
Project Leader, Fire Management
San Dimas Technology & Development Center
444 East Bonita Avenue, San Dimas CA 91773-3198
Phone 909-599-1267; TDD: 909-599-2357; FAX: 909-592-2309
E-mail: mailroom_wo_sdtdc@fs.fed.us
Information
contained in this document has been developed for the guidance of employees
of the Forest Service, United States Department of Agriculture (USDA),
its contractors, and cooperating Federal and State agencies. The USDA
assumes no responsibility for the interpretation or use of this information
by other than its own employees. The use of trade, firm, or corporation
names is for the information and convenience of the reader. Such use does
not constitute an official evaluation, conclusion, recommendation, endorsement,
or approval of any product or service to the exclusion of others that
may be suitable.
The U.S. Department
of Agriculture (USDA) prohibits discrimination in all its programs and
activities on the basis of race, color, national origin, sex, religion,
age, disability, political beliefs, sexual orientation, or marital or
family status. (Not all prohibited bases apply to all programs.) Persons
with disabilities who require alternative means for communication of program
information (Braille, large print, audiotape, etc.) should contact USDA’s
TARGET Center at (202) 720-2600 (voice and TDD).
To file a complaint
of discrimination, write USDA, Director, Office of Civil Rights, Room
326-W, Whitten Building, 1400 Independence Avenue, SW, Washington, D.C.
20250-9410 or call (202) 720-5964 (voice and TDD). USDA is an equal opportunity
provider and employer. |